06. Lab I: Solution
Solution: Build a Dog Microservice - Eureka
Below, we'll walk through each step of the lab and look at one potential way to implement the lab. Even if you get stuck, you should always first try to work through the lab without the solution before coming here, so that you can best learn the related skills and be ready for the project at the end of the course.
Step 1: Create a SpringBoot project that creates a Eureka server.
- Ensure that you use the proper dependencies in the Maven POM file and the necessary annotations.
- Make a note of the service URL and add any other necessary details in
application.properties.
First, navigate once again to Spring Initializr. You can add the Config Client (for spring-cloud-starter-config) and Eureka Server (for spring-cloud-netflix-eureka-server) dependencies to generate the POM file for this project. Remember that since this is just the Eureka server and not the microservice client you will build later, you won't need dependencies like H2.
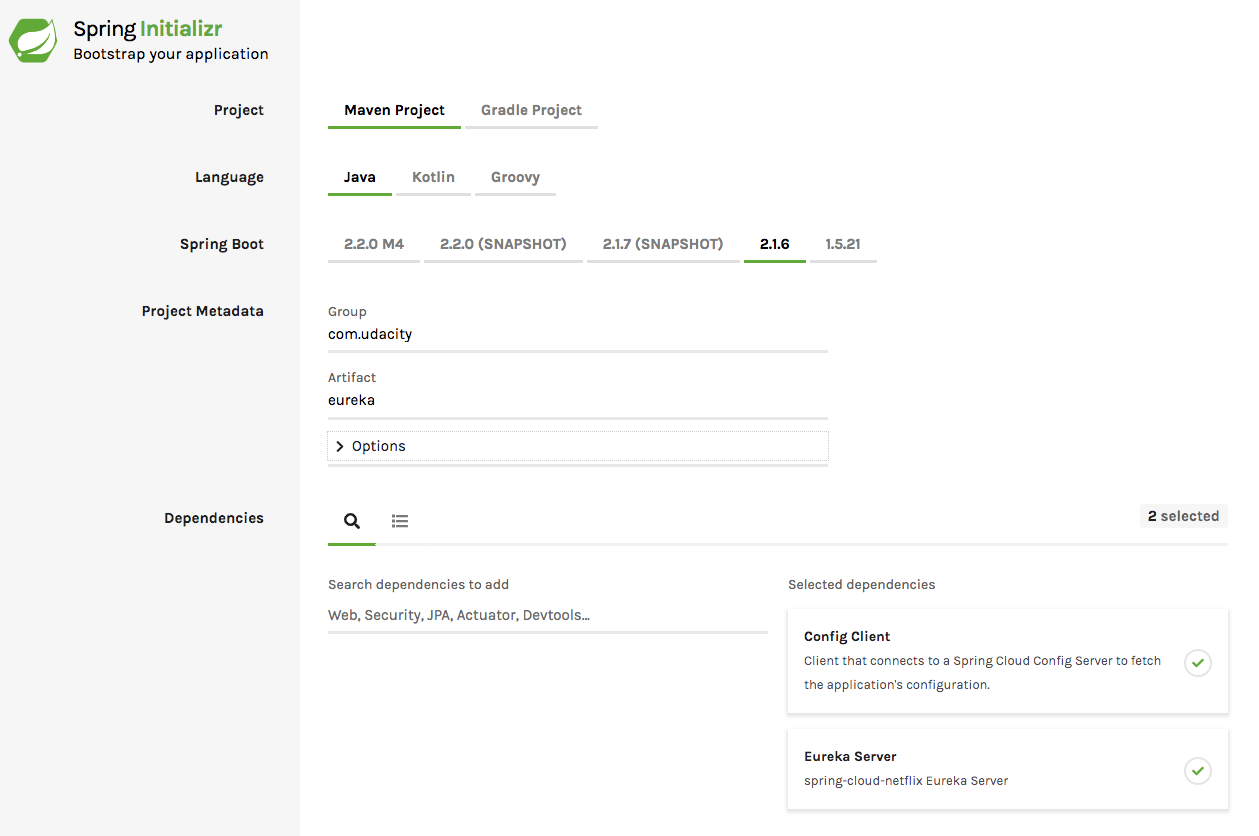
Select the correct dependencies for the project
Additionally, I added the below additional dependency to my POM file to get the Eureka server up and running:
        <dependency>
            <groupId>javax.xml.bind</groupId>
            <artifactId>jaxb-api</artifactId>
            <version>2.4.0-b180725.0427</version>
        </dependency>
From there, navigate to your application.properties file to add the application name and server port (8761 in the case of a Eureka server, typically). Below, I have also added lines to avoid registering the Eureka server itself as a client, as well as adding some additional logging to help with any potential debugging or information needs.
spring.application.name=eureka-server
server.port=8761

# avoid registering itself as a client
eureka.client.register-with-eureka=false
eureka.client.fetch-registry=false
logging.level.com.netflix.eureka=ON
logging.level.com.netflix.discovery=ON
You're already almost done! Now, we just need one import and one annotation added to EurekaApplication.java - importing EnableEurekaServer and adding the related annotation.
package com.udacity.eureka;

import org.springframework.boot.SpringApplication;
import org.springframework.boot.autoconfigure.SpringBootApplication;
import org.springframework.cloud.netflix.eureka.server.EnableEurekaServer;

@SpringBootApplication
@EnableEurekaServer
public class EurekaApplication {

    public static void main(String[] args) {
        SpringApplication.run(EurekaApplication.class, args);
    }

}
Step 2: Use a web browser to view the Eureka web console.
Navigate to http://localhost:8761/ on your computer to view the Eureka web console. Note again that Eureka servers are typically put on port 8761, but if you would have used a different server port in application.properties, you would instead navigate to that port.
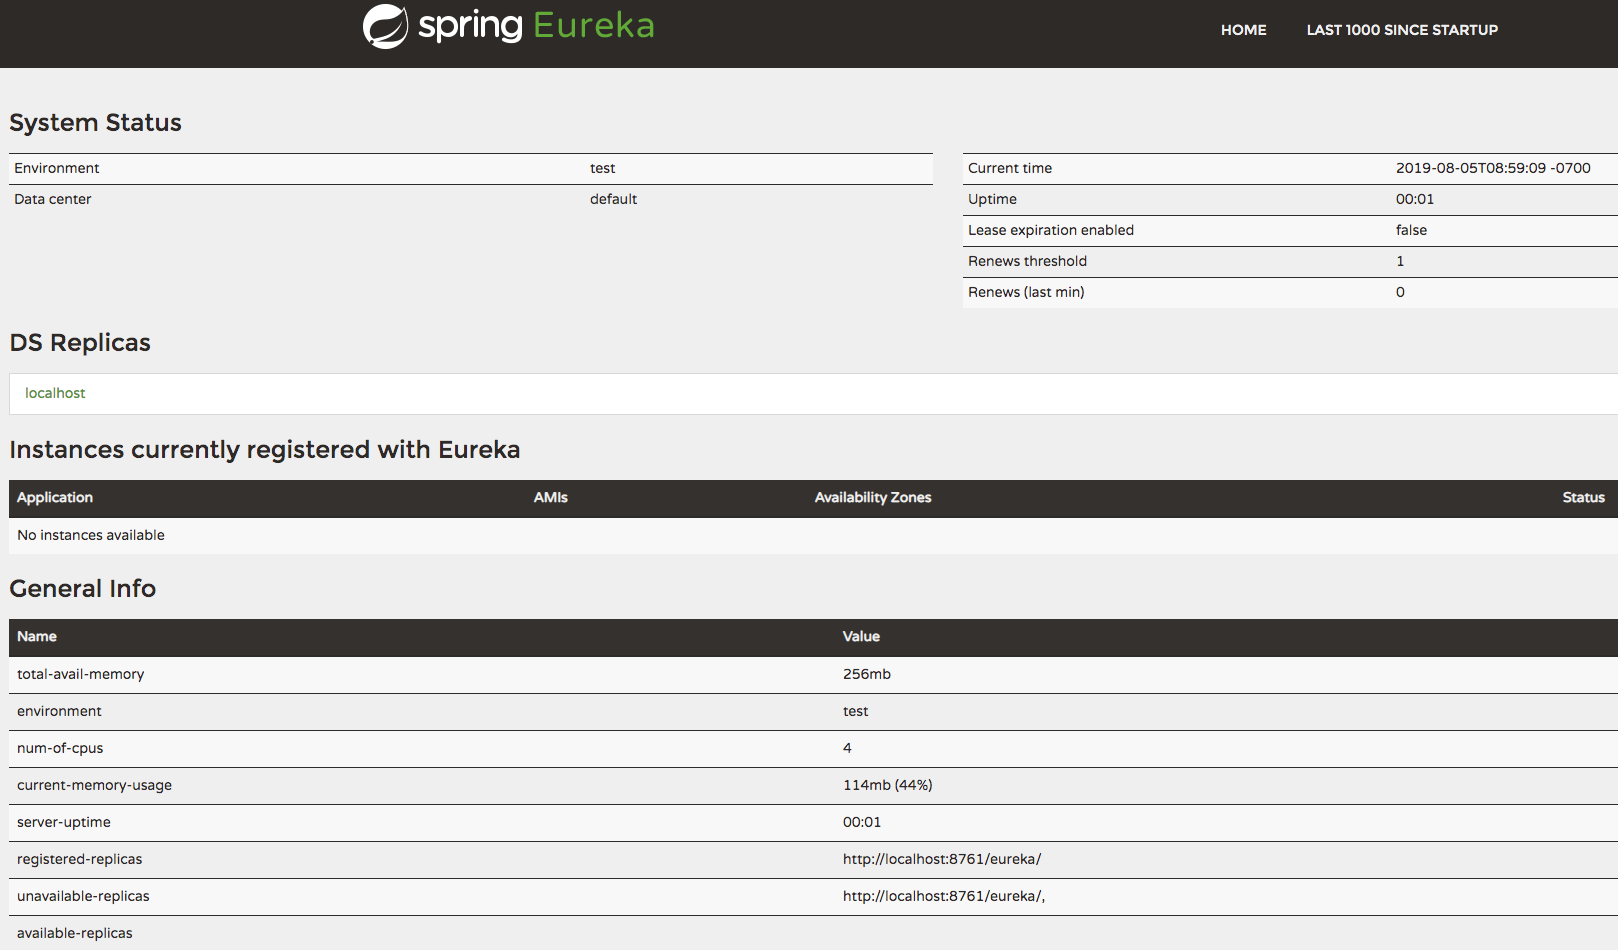
A view of the Eureka web console
Eureka Server Solution
You can get the full code for the Eureka server below; we'll include it again at the end of the final lab solution of this lesson.